Introduction of Button Functions on Main Interface Offline POS Terminal
In the offline POS terminal main interface, you may wonder what is the function for certain buttons or text fields, such as “New” button, “Delete” button and so on. Below are some steps on how to use those functions.
A. Delete button
B. New Button
C. Table
D. Extra discount
E. Cash Drawer
F. Discount by value or percentage, change price, change quantity
A. Delete button
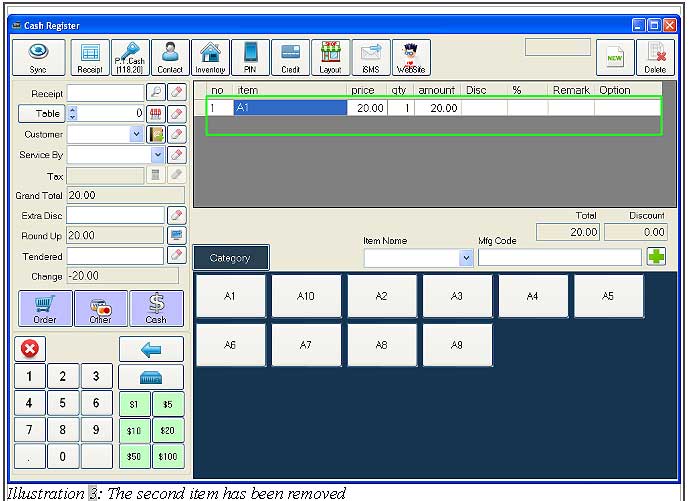
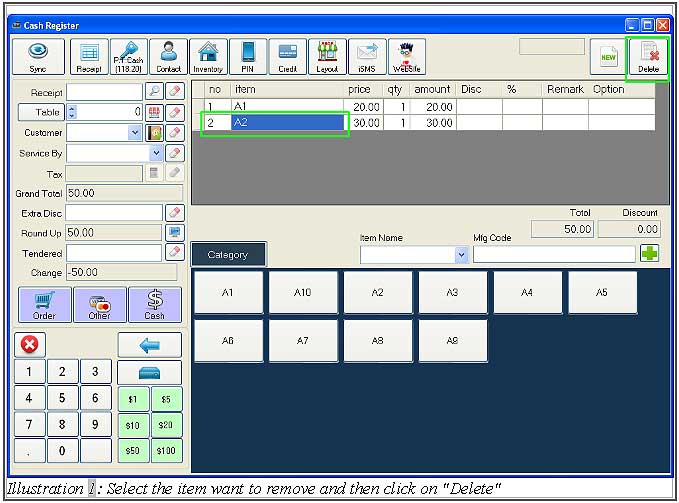
1. This button can be used when you want to delete one of the items from the selected item list. You need to select the item which you want to delete, then click on the “Delete” button to remove the item.
Please click on image to view clearer.
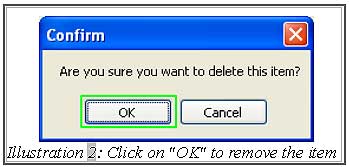
2. A confirmation message will pop up. Click “OK” to confirm delete that item.
Please click on image to view clearer.
B. New Button
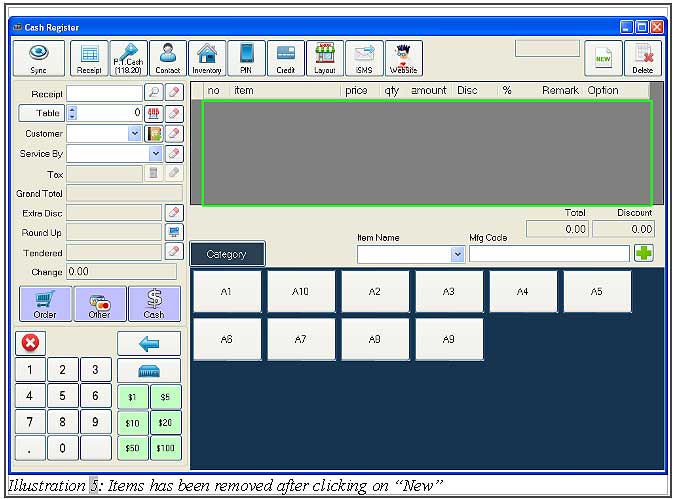
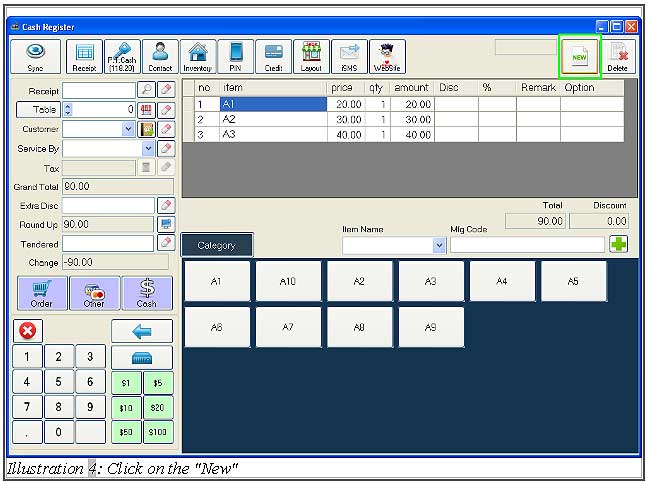
1. This button can be used when you want to remove all items that you have selected.
Please click on image to view clearer.
C. Table
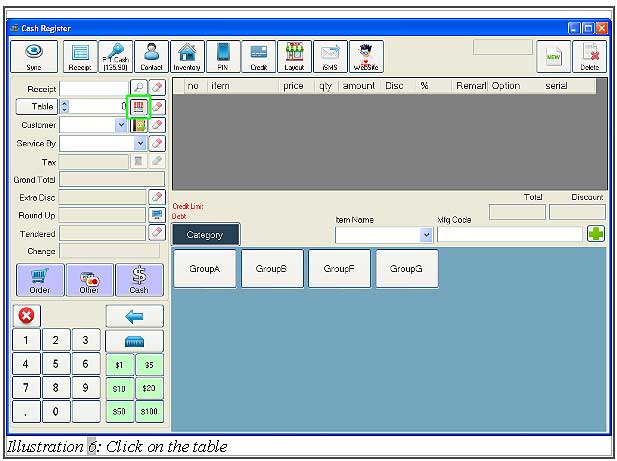
1. This function is used to record the order by using table number. You can click on the table button beside “Table” to select table.
Recommended: If this system is used in restaurant, you are recommended to enter the table number first before selecting the item.
Please click on image to view clearer.
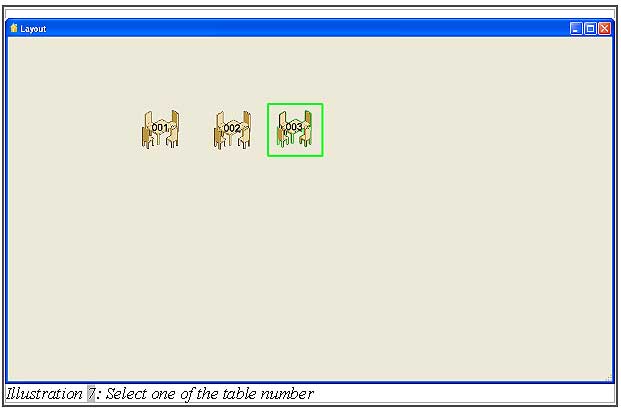
2. Select one of the table number.
Please click on image to view clearer.
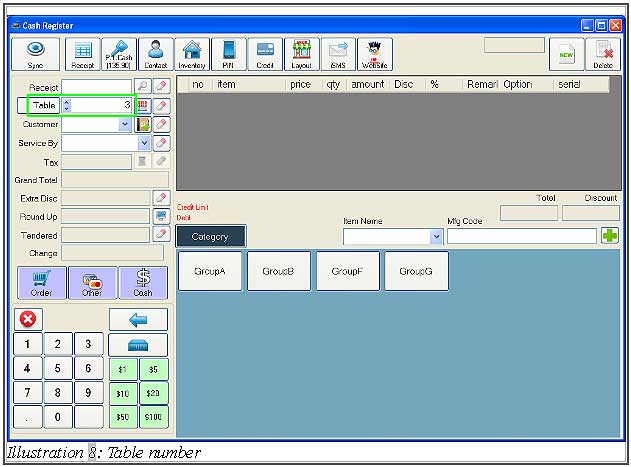
3. After selected, the table number will appear in the table (text box).
Please click on image to view clearer.
D. Extra discount
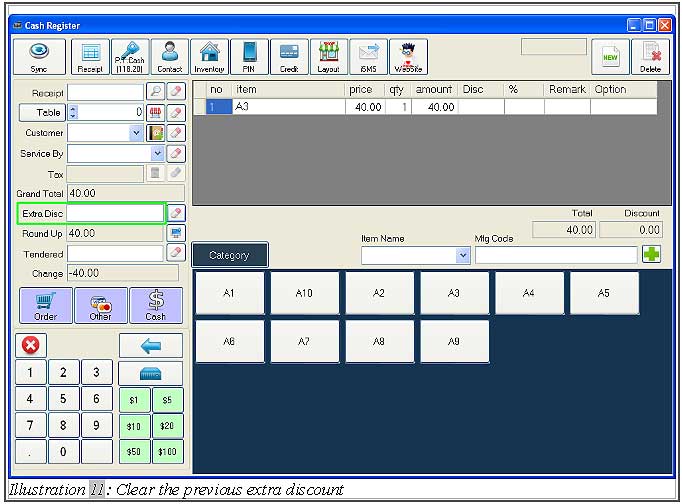
1. Extra discount is used to give additional discounts to the customer based on the grand total but not for every item. Note: The total extra discount cannot be higher than the grand total.
Please click on image to view clearer.
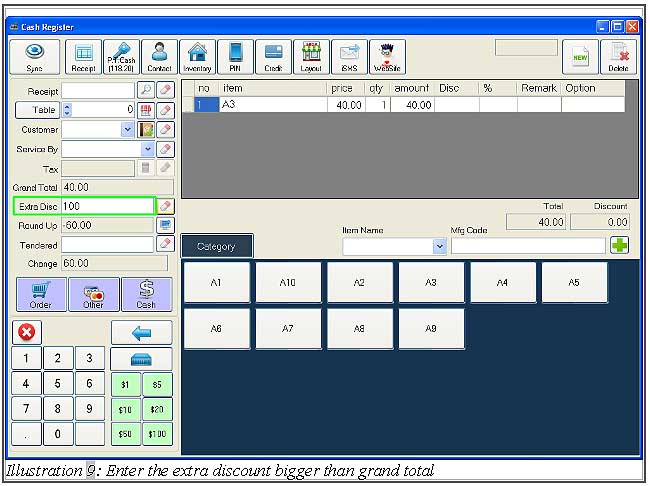
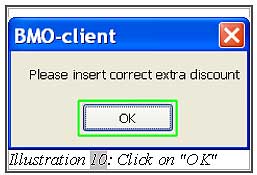
2. If the extra discount is higher than the grand total, a message will pop up to ask you key in the extra discount again.
Please click on image to view clearer.
E. Cash Drawer
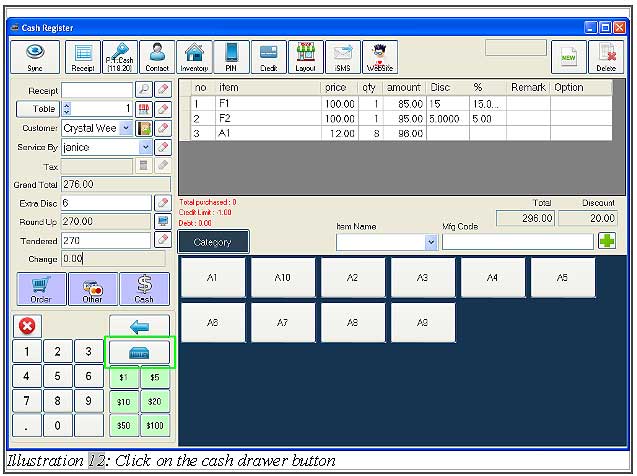
1. You can open the cash drawer by clicking the cash drawer button. Only users with the granted permission can open cash drawer by keying in the username and password. Click on “Cash Drawer” button as shown in Illustration 12 to open the cash drawer. This permission can be set in online BMO system.
Please click on image to view clearer.
F. by value or percentage, change price, change quantity
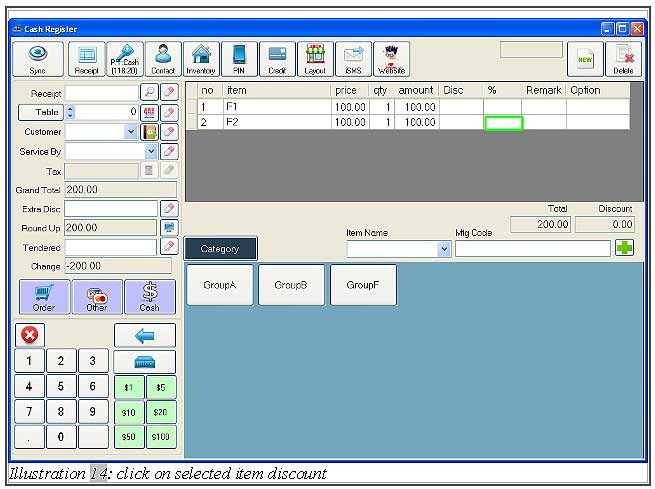
1. To give discount in percentage to customer, you can click on the box of that item under the “%” column.
Please click on image to view clearer.
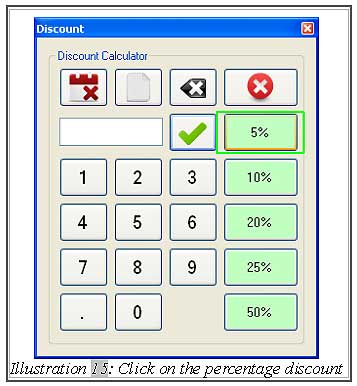
2. A discount form will then pop up to ask you enter the discount. For example, your want to offer discount 5% for the item, then click on the “5%” button.
Please click on image to view clearer.
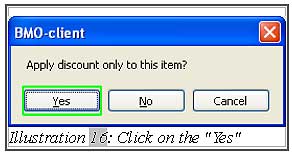
3. A confirmation message will pop up. You must click “Yes” to apply discount on the item.
Please click on image to view clearer.
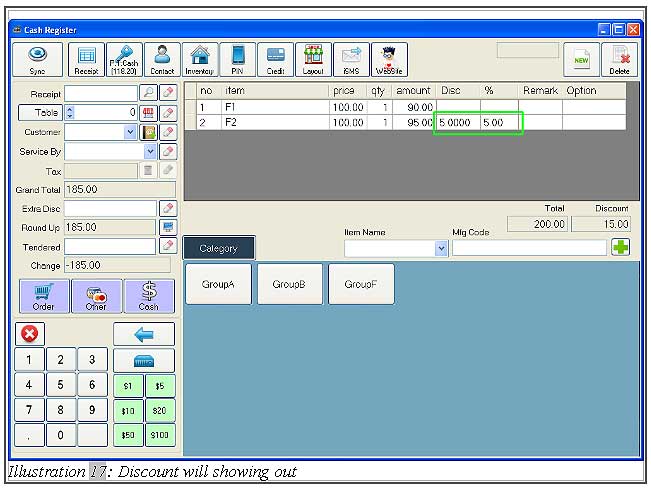
4. After applying, the discount will be shown as in Illustration 17.
Please click on image to view clearer.
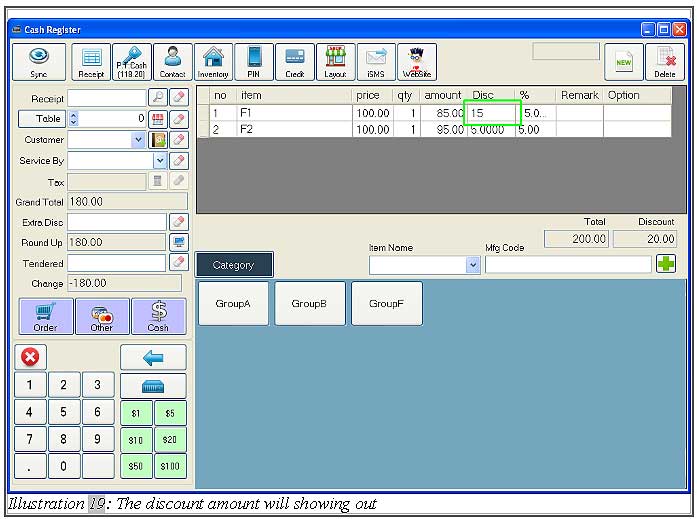
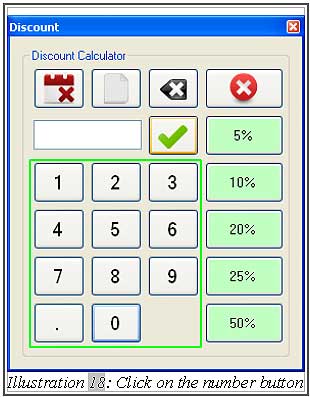
5. To give discount in value, you can insert discount value by clicking on the box of that item under Disc column, for example 15.
Please click on image to view clearer.
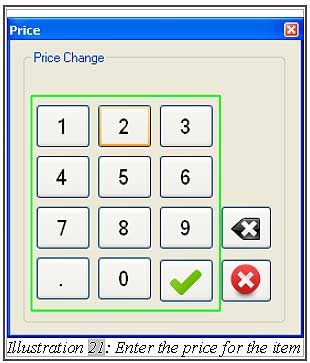
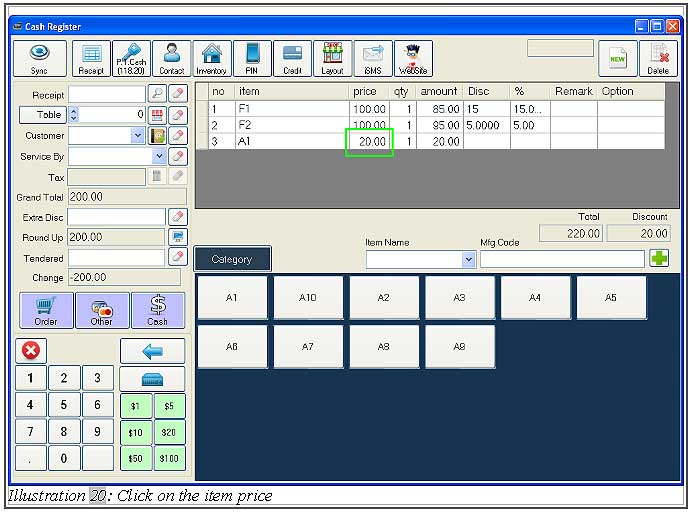
6. To change an item price, click on the box of that item under “price” column. Insert the price by using “price form” as shown in Illustration 21.
Please click on image to view clearer.
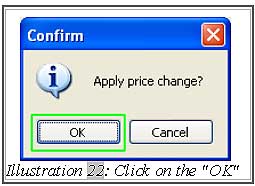
7. A confirmation message will pop up. To apply price change, click “OK”.
Please click on image to view clearer.
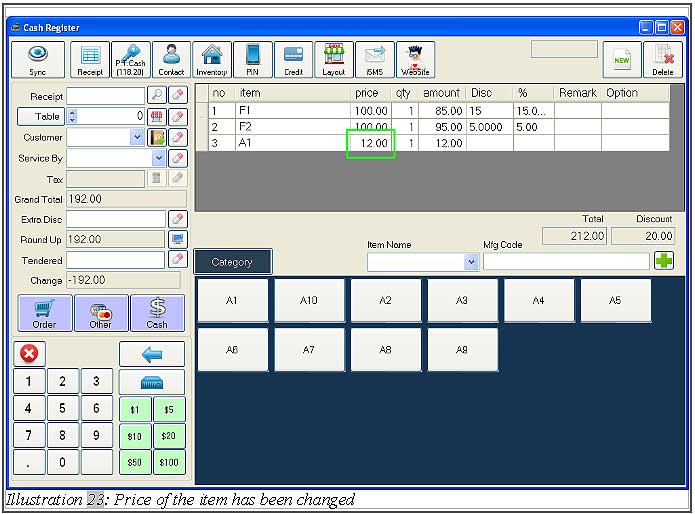
8. The price has been changed as shown in Illustration 23.
Please click on image to view clearer.
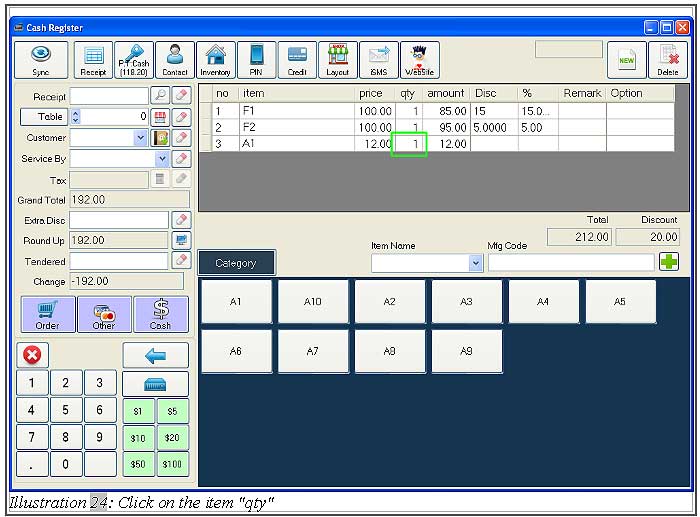
9. To change the quantity, you can click on the box of that item under the qty column.
Please click on image to view clearer.
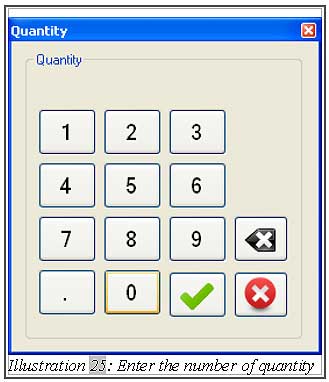
10. Enter the number of quantity, then click on the “tick” button.
Please click on image to view clearer.
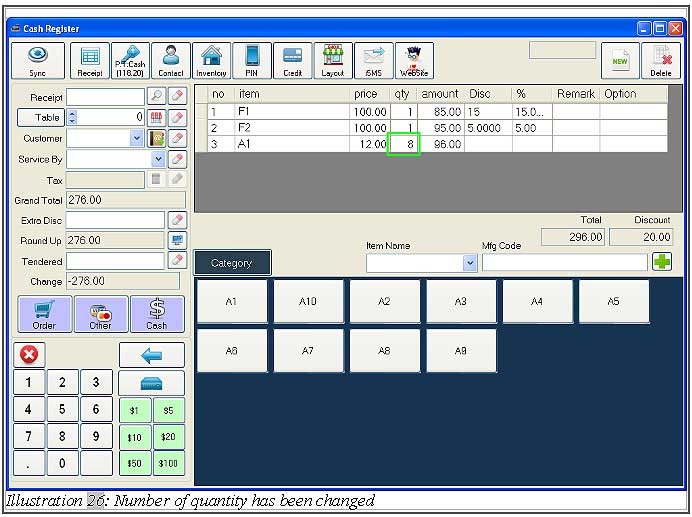
11. Finally, the number of quantity has been changed.


